Requirements
The Smithtech Timeclock app is compatible with Android versions 7 through 15 and is optimized for tablets with a screen size of at least 7 inches.
Installation
If you have purchased our Time Clock app pre installed on a Tablet you can skip this Installation section.
Download
the Smithtech Time Clock app and install it on an Android device in the usual fashion.
When the application is first run it will ask for you to allow it permission to make and manage phone calls.
This is needed by the app to obtain the Device ID. Tap on Allow. Next you will be asked for an UnLock Code.
The UnLock Code is emailed to you after purchase of the Smithtech Time Clock app.
Once the UnLock Code has been entered, the app will ask for access to the following:
Tap allow on each item. Once the app permissions have been set you will be presented with a warning
about the importance of setting up a Google email account on the device so that the app can email project details.
Tap on "I Understand". Installation is now complete.
Setup
One of the first things you'll want to do after you get the Time Clock app up and running is to setup your Gmail e-mail account on the device so you can email your project details. If you do not enter your email address in your device, it will not be able to email your project time or sync to another device.
Some devices do not have an SD Card, so if you lose or damage your device, you will lose all your project details. To guard against losing your data, you can use the Backup Database feature which allows you to backup the data to your email. The device needs an internet connection only to backup data or send email.
Set the Operator Name for this device by tapping on the overflow menu at the top of the Time Clock app. Choose the Set Operator menu option and fill out the operator name.
Getting Started
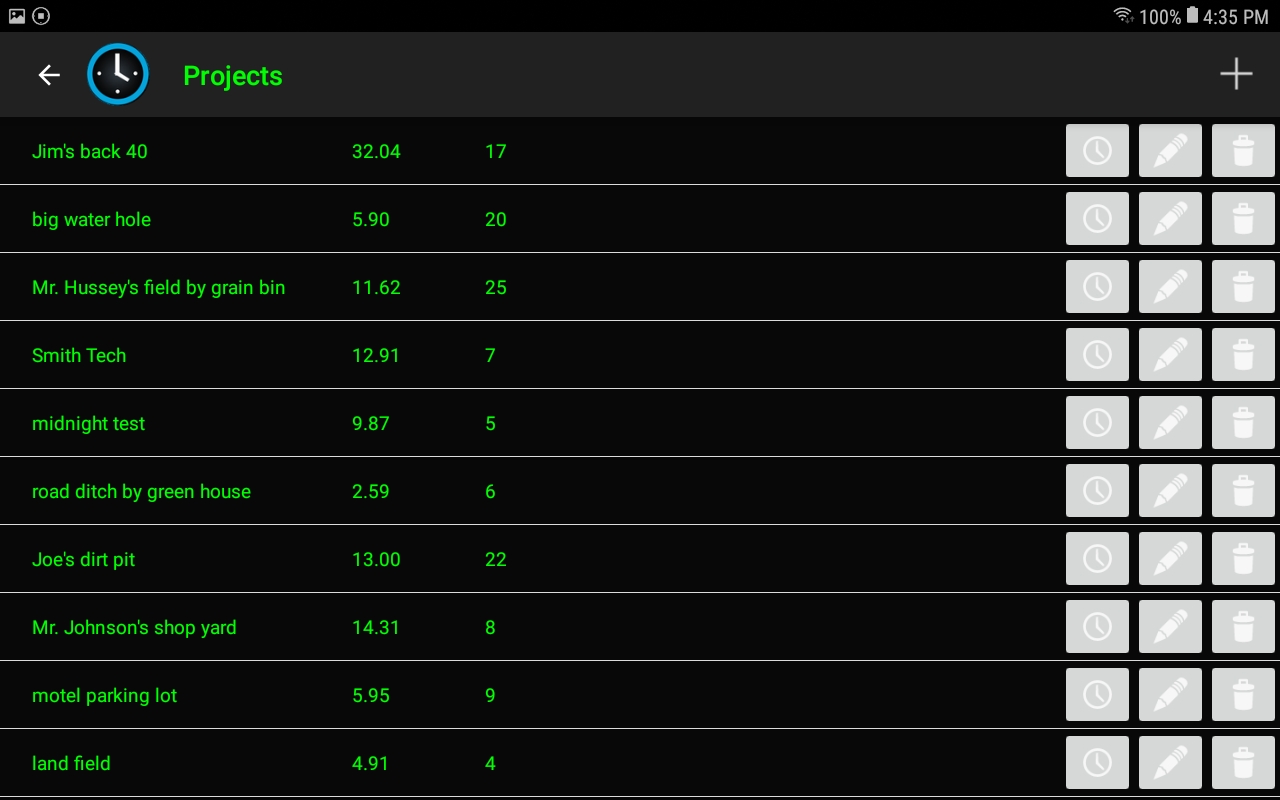
To get started you must create a new Project by tapping on the folder icon at the top of the Time Clock app main page.
![]()
This takes you to the Projects folder shown below. The Projects folder holds all of your projects. Each project is displayed in a row. Each project row has three columns, Project Name, Project Hours, and the number of Loads. Your most recently used Projects will always be at the top of the list. Here you can also select a different project, add a new project, edit or delete projects.
To add a new Project tap the plus sign in the upper right, it pops up the “Add Project” dialogue.
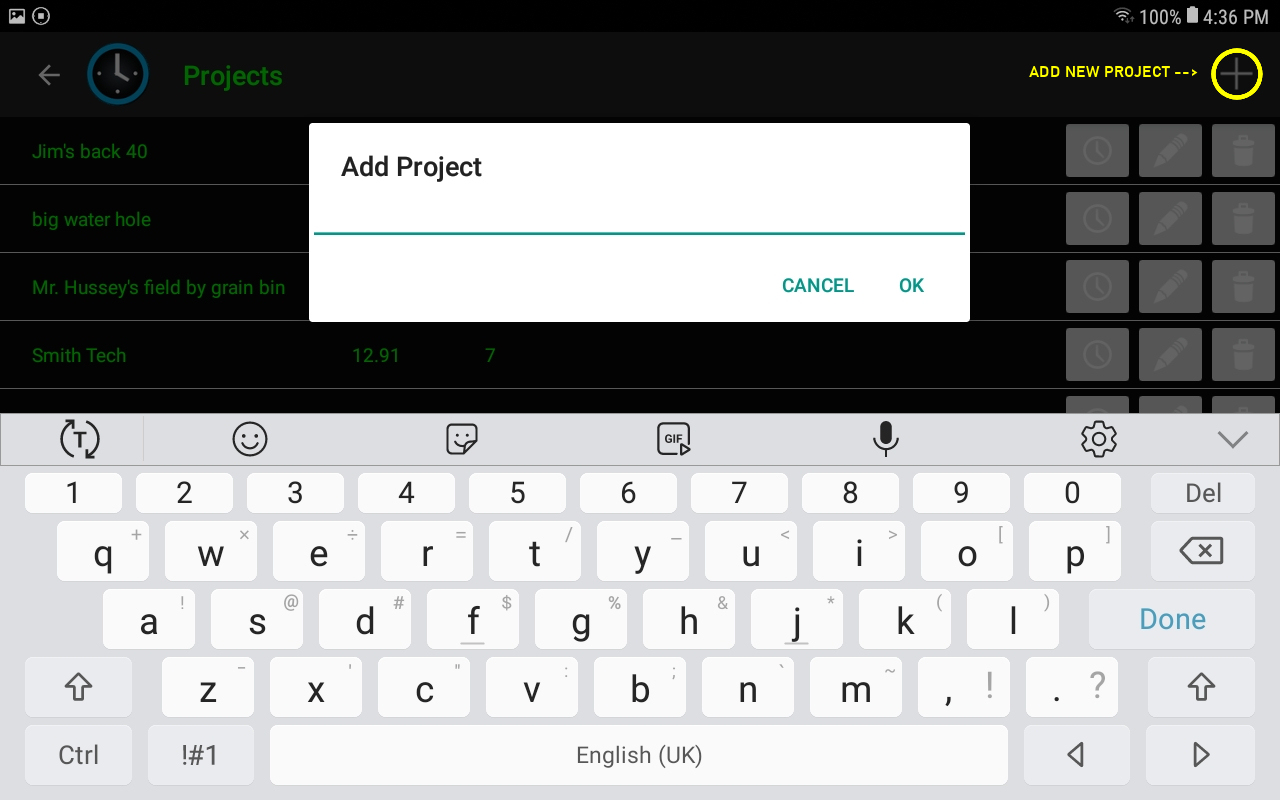
Fill out the Project Name and tap OK. Your Project has now been added to the Project folder and is ready to store Project details. Tap the back button to go back to the main screen.
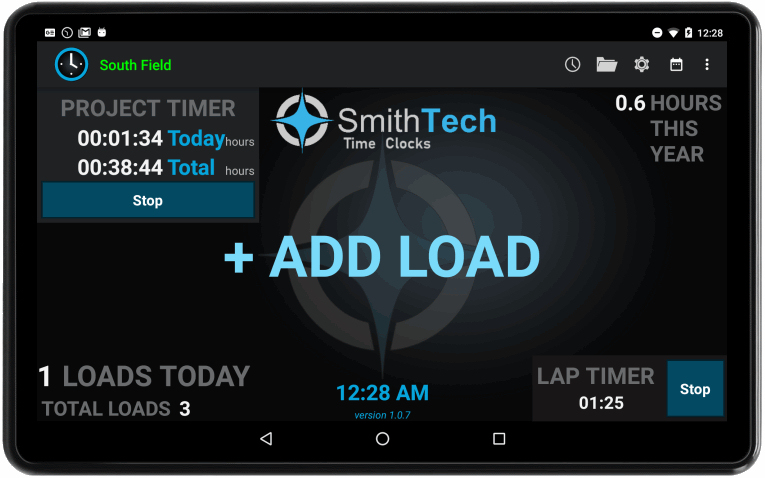
Starting The Project
At the beginning of each day you will want to start the Project Timer by tapping on the Project Timer Start Button in the upper left corner.
The project timer keeps track of the overall time spent on each project.
Once you have the first load ready to trasport, tap on the Lap Timer Start Button in the lower right corner.
The Lap Timer keeps track of how long it takes to transport a load, dump it, and then return for another load.
Once the Lap Timer is running, tap +ADD LOAD in the middle of the screen to add your first load to the load counter.
Each time you have a full load tap +ADD LOAD to increase the load count, this also resets the Lap Timer to zero.
When you are done hauling for the day, tap on the Project Timer Stop Button.
NOTE:
THE CLOCK DOES NOT STOP RUNNING UNTIL YOU PUSH THE STOP BUTTON.
If you leave a clock running and your battery goes dead, the clock will still be running next time you start
your device.
The Project Timer will stay running even when you are in a different app.
The spinning clock icon in the upper left area of the Android Status Bar means the Project Timer is running.
A circle with a dot in the Android Status Bar means the Project Timer is stopped.
You can only have the Project Timer running for one project at a time.
If you have the Project Timer running and you go to your Project List and tap on another project, the Project Timer will stop.
Settings
Use the Settings Menu (gear icon) to set how you want your time displayed: in hour/min. or hour/tenths. You can also configure how big your tap area is for the load counter or disable the sound. You can also enabled Special Features if you have purchased the appropriate Unlock Code.
The brightness of the screen is controlled by the Android Device drop down bar.
Edit Load and Time Entries
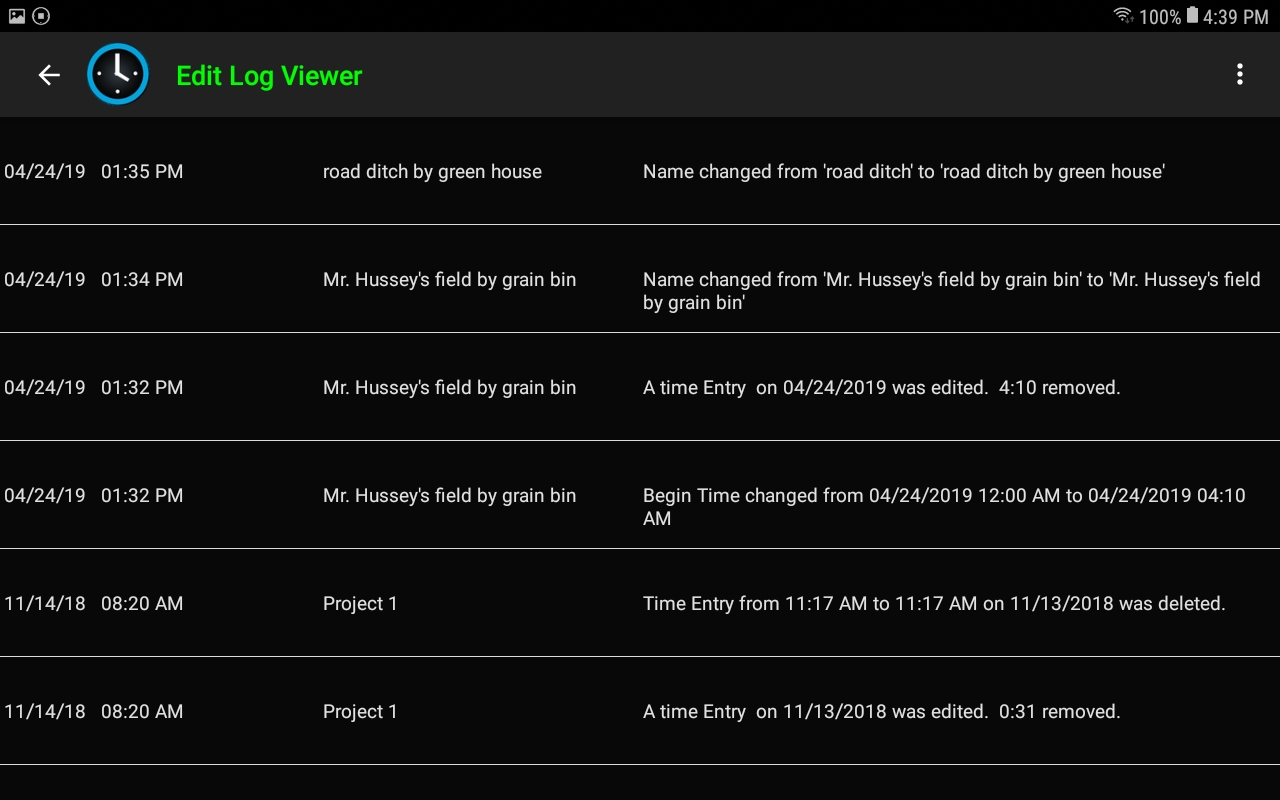
You can edit your time entries or delete loads in their respective screens. Every start and stop of the timer creates one time entry for a project, which can then be edited. Loads can be deleted.
When time entries get edited, an “edit log” (shown below) will appear in the HTML file that gets attached to the email.
Backup and Restore your Project Data
Backup you data often! If your Android device gets lost, stolen, or damaged, you will lose your project data!
To Backup the database, choose Export DB from the overflow menu. This function will compress the database and then show the Gmail icon at the bottom. Select the Gmail app. The Smith Tech Time Clock will attach the compressed database to the email. Fill in a recipient email address and an appropriate subject, then click the paper airplane icon at the top of the Gmail app to send the email.
To restore a previously backed up database you must open the Gmail app and download a database than was
previously sent. Next choose Import DB from the overflow menu. Select the database you want to import.
WARNING: If you restore a previous database you will lose any time that was logged after the
database was backed up.
Every five days the Smith Tech Time Clock app will ask you if you would like to save a local copy of the database. If you agree, then you can restore the saved database if ever needed by selecting Restore Last DB Backup from the overflow menu. Again, be aware that you will lose any time logged after the database was saved.
1315 Industrial Park Drive,
Clarksdale, Mississippi 38614
U.S.A.
662-902-3868
